
Puss in the Corner for Jen Kingwell’s Gypsy Wife Quilt Sew-along
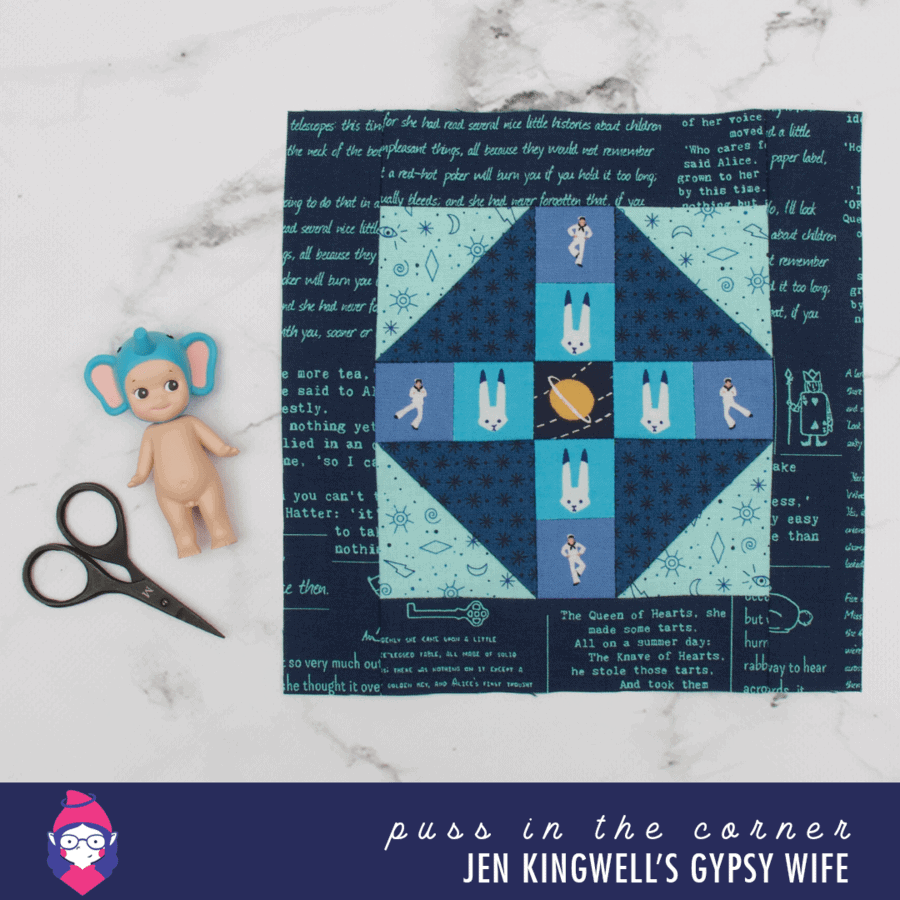
Puss in the Corner is the block of choice for this week in the Jen Kingwell’s Gypsy Wife Quilt Sew-along. You’ll need to make 2 of these blocks, one with a border (pictured above) and one without. This is a super simple block to make, but in case you don’t like cutting triangles I’ve provided an alternate method for making the HSTs in this block. I’m also talking about assembling this quilt today because I’m about half way through and I’ve found an issue with the assembly diagram that you may like to know about.
I’ve tried to make things a little easier for you to find by adding some collapsable text areas. All you have to do is click on the grey bar to expand the information that you’re looking for. I’m hoping this makes it easier for those of you that are on mobile devices. If you have any trouble with it please let me know.

Cutting Instructions
Must do: Grab a pencil and beside each cutting measurement write a number starting at 1 and ending at 4 from top to bottom of the list. You’ll need to number the cutting instructions like this so you know what measurement I’m referring to. Due to copyright reasons and my undying respect for the pattern designer I will not be telling you the direct measurements for this block, you will need to follow my instructions below and use the pattern to work it out.
Please Note: Instead of giving you cutting measurements to correspond with the fabric identification, I’m going to break them down into the components of the block so you can mix and match your fabrics as needed.
Half Square Triangle
2 – Square equalling measurement 3 (Piece 1) plus 1/8″ – Dark Blue Astericks
2 – Square equalling measurement 3 (Piece 2) plus 1/8″ – Light Blue Tattooed
Construction
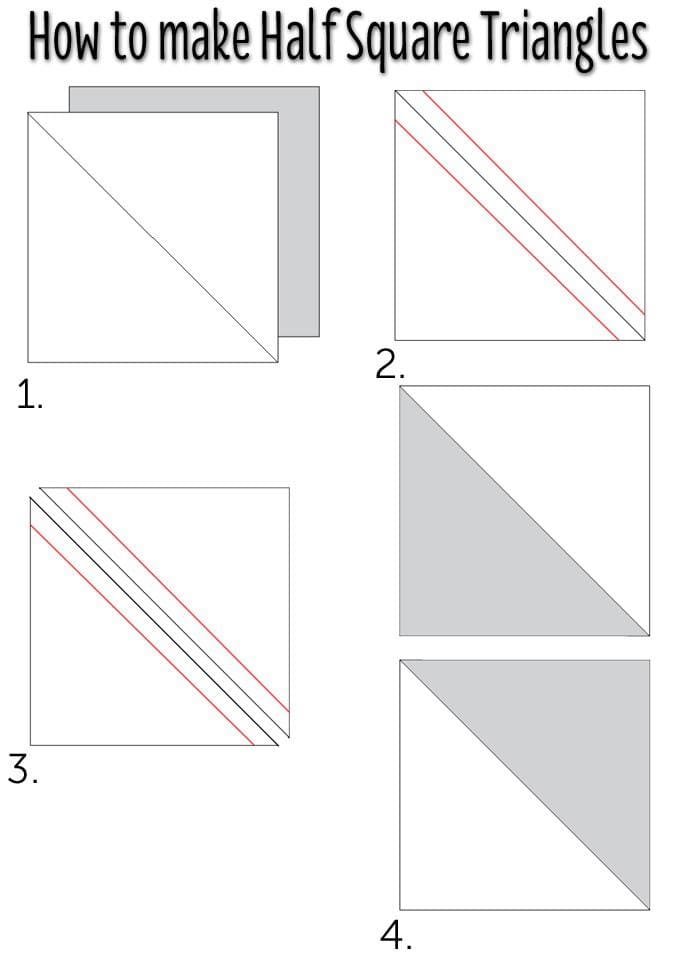
- On the wrong side (back) of all the Piece 1 squares draw a diagonal line with a pencil/fabric pen from one corner to the opposite corner as per step 1 above.
- Take 1 Piece 1 and 1 Piece 2 and put them right sides together as per step 1 above.
- Stitch a scant quarter inch seam on either side of the line as per step 2 above.
- Trim along the drawn line as per step 3 above. This will make 2 HST units. Trim to the 2 ½”
- Repeat above steps to make 4 HSTs in total.
- Complete block as per the instructions.
Notes on Assembly
We’re not due to start on the construction of the quilt top until December 14 2017, but I’ve been working on it behind-the-scences to make sure that we’re able to troubleshoot any issues that may arise for people. I’ve updated the line drawing to reflect where there’s an error in the pattern and included more information about block sizes as well.

For those of you that are using this line diagram to help work out your strips I wanted to remind you that the small print on this diagram is that there’s been some changes to the strips. Please be mindful of this when it comes to assembly.
That’s everything… for now… as always if you have any questions either drop me a line or leave a comment below and I’ll do my best to help you out. I hope you love making this quilt as much as I have, it’s such a fun way to make a unique sampler.



i absolutely love your block! it’s making me re-think my blocks… (still have to figure out how to load to instagram.) thanks for your inspiration! hope you’re feeling better! 🙂
I’ve been sewing along with you. I actually finished my quilt top last week. I found that the left side of the quilt strips came up short by at least a half inch. I can either add a strip to the bottom or trim off the rest of the strips to square it up. I don’t know if anyone else had a problem with this. I also improvised the block in red above. Love this quilt and want to make another one already.
Oh thanks for the heads up Nancy! I’m about half way through assembling the top so I’m yet to run into the strip issue. I’ll be sure to pay attention to it as I’m working so I can let people know if it’s an issue. I’m so glad you love the quilt, I’m really enjoying it as well.
This is truly my most annotated pattern ever! I have had my pattern languishing for a long while so I don’t know if it has been changed, but I also found that the partial seam in section 10s assembly was indicated for the wrong seam. The pattern isn’t particularly informative about what goes where & just isn’t written for control freaks like me who want to plan out the entire quilt from whoa to go!
Hi Jordan, I understand your frustration and it’s why I’ve done my best to collate all the information I can to help you best tackle this project. I have to confess that I’m a bit of a control freak as well, but I’m having a really enjoyable time working out the puzzle that is this quilt. Something about working out how it’s all fitting together appeals to the 10,000 piece puzzle completer in me.
Ahhh, this diagram is SO HELPFUL!!! Thank you ?I’ve been working on getting my filler blocks started but was having time because my quilt has a specific color progression and determining what size to make in certain colors was becoming a lot of extra work. Are the listed measurements finished size?
Hi Leslie, due to copyright I’m unable to tell you what the measurements are past saying “they match the block measurements in the pattern”.