
Star Block for Jen Kingwell’s Gypsy Wife Quilt Sew-along
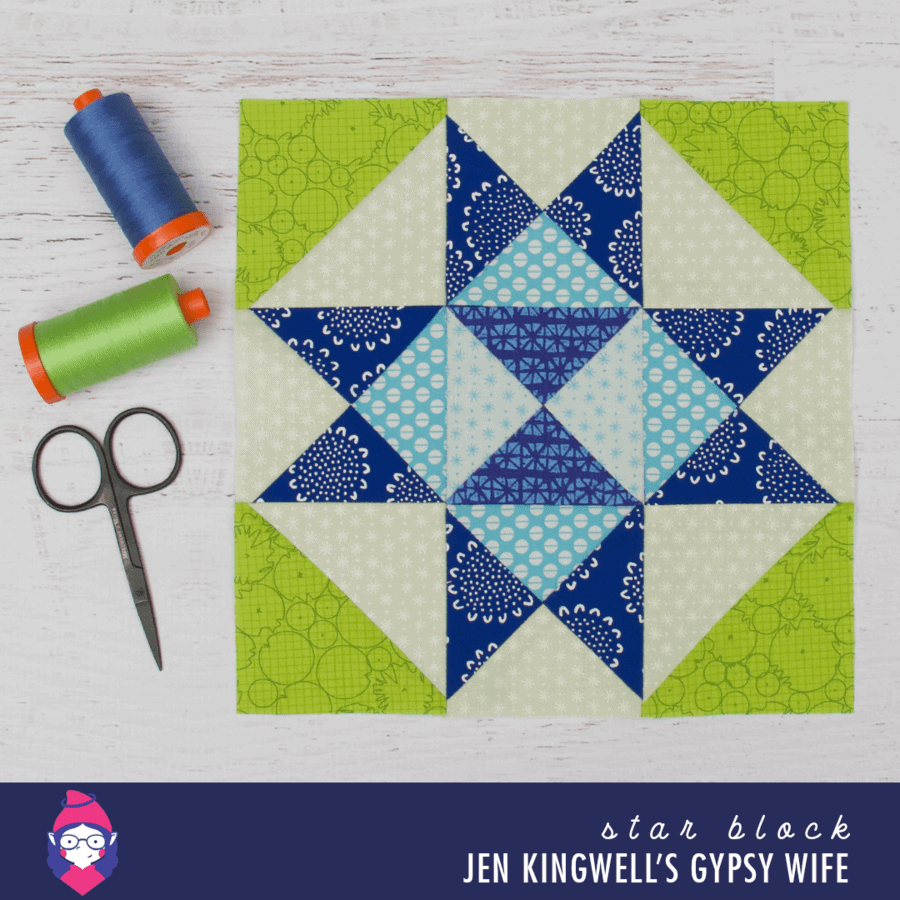
Star Block is the block of choice for this week in the Jen Kingwell’s Gypsy Wife Quilt Sew-along. This is such a simple block that has great impact. I’ve done up an alternate method of construction for this block so if you’re like me and prefer to make HSTs without cutting the individual triangles. You’ll still need the pattern so you know the measurements.
I’ve tried to make things a little easier for you to find by adding some collapsable text areas. All you have to do is click on the grey bar to expand the information that you’re looking for. I’m hoping this makes it easier for those of you that are on mobile devices. If you have any trouble with it please let me know. Now… on to the block!

Star Block Alternative Construction
For the purpose of these alternate instructions you will need to use these in conjunction with the instructions on page 11 of your Gypsy Wife pattern book.
I apologise that the fabrics are so similar in colouring and not as distinctive for the purposes of identification. Make sure to consult the block diagram so that you can ensure you’ve used the right fabrics in the right place if you’re using more fabrics than provided in the book. To save on confusion I’ve not tried to identify which prints go with which fabric identifier in the pattern.
Must do: Grab a pencil and beside each cutting measurement write a number starting at 1 and ending at 4 from top to bottom of the list. You’ll need to number the cutting instructions like this so you know what measurement I’m referring to. Due to copyright reasons and my undying respect for the pattern designer I will not be telling you the direct measurements for this block, you will need to follow my instructions below and use the pattern to work it out.
Please Note: Instead of giving you cutting measurements to correspond with the fabric identification, I’m going to break them down into the components of the block so you can mix and match your fabrics as needed.
Inner Quarter Inch Triangle Unit
1 – Square equalling measurement 1 (Piece 1) – Dark Blue Kate Spain
1 – Square equalling measurement 1 (Piece 2) – Pale Blue Astericks
Please note: this method will make 2 of these units, you will only need one for the finished block. Pop the spare block into your orphan block stash to use in another project.
Outer Quarter Inch Triangle Units
2 – Square equalling measurement 1 (Piece 3) – Dark Blue Blueberry Park
1 – Square equalling measurement 1 (Piece 4) – Blue Circles
1 – Square equalling measurement 1 (Piece 5) – Pale Green Astericks
Corner HST Units
2 – Square equalling measurement 1 minus ¼” (Piece 6) – Green Archtextures
2 – Square equalling measurement 1 minus ¼” (Piece 7) – Pale Green Astericks
Construction

- Inner Quarter Inch Triangle Unit: On the wrong side (back) of all Piece 1 draw a diagonal line with a pencil/fabric pen from one corner to the opposite corner as per step 1 above.
- Take 1 Piece 1 and 1 Piece 2 and put them right sides together as per step 1 above.
- Stitch a scant quarter inch seam on either side of the line as per step 2 above.
- Trim along the drawn line as per step 3 above. Press to the darkest fabric (this will help with making the three triangle units.) This will make 2 HST units. Trim to the measurement 1 minus ¼”. These will be referred to as Middle HSTs in the rest of the construction method.
- On the wrong side (back) of one Middle HST draw a diagonal line with a pencil/fabric pen from one corner to the opposite corner, that intersects the seam, as per step 1 above.
- Take the two Middle HSTs and put them right sides together as per step 1 above. Important: the drawn line must run in the opposite direction of the seam line so they form an X as shown below.

- Stitch a scant quarter inch seam on either side of the line as per step 2 above. Open the seam up to confirm that you have stitched them so that when trimmed along the stitch line you’ll have formed the quarter triangle unit as per the pattern diagram
- Trim along the drawn line as per step 3 above. This will make 2 quarter triangle units. Trim all units to 3.5″. You will only need one of these units. Pop the spare block into your orphan block stash to use in another project. This one unit is the middle unit of this block.
- Outer Quarter Inch Triangle Unit: On the wrong side (back) of all Piece 3 draw a diagonal line with a pencil/fabric pen from one corner to the opposite corner as per step 1 above.
- Take 1 Piece 3 and 1 Piece 4 and put them right sides together as per step 1 above.
- Stitch a scant quarter inch seam on either side of the line as per step 2 above.
- Trim along the drawn line as per step 3 above. Press to the darkest fabric (this will help with making the three triangle units.) This will make 2 HST units. Trim to the measurement 1 minus ¼”. These will be referred to as Outer HSTs in the rest of the construction method.
- Repeat steps 10 – 12 with the remaining Piece 3 and Piece 5. You should have 4 Outer HSTs.
- On the wrong side (back) of two Outer HST draw a diagonal line with a pencil/fabric pen from one corner to the opposite corner, that intersects the seam, as per step 1 above.
- Pay attention to fabrics at this point if you’re using a mix of prints! Take two Outer HSTs, one with Piece 3 and 4 and one with Piece 3 and 5, and put them right sides together as per step 1 above. Important: the drawn line must run in the opposite direction of the seam line so they form an X as shown above.
- Stitch a scant quarter inch seam on either side of the line as per step 2 above. Open the seam up to confirm that you have stitched them so that when trimmed along the stitch line you’ll have formed the quarter triangle unit as per the pattern diagram
- Trim along the drawn line as per step 3 above. This will make 2 quarter triangle units.
- Repeat steps 15 – 17 to make remaining units. Trim all units to 3.5″. You should have four outer quarter inch triangle units.
- Corner HST Unit: On the wrong side (back) of all Piece 6 draw a diagonal line with a pencil/fabric pen from one corner to the opposite corner as per step 1 above.
- Take 1 Piece 6 and 1 Piece 7 and put them right sides together as per step 1 above.
- Stitch a scant quarter inch seam on either side of the line as per step 2 above.
- Trim along the drawn line as per step 3 above. Press. This will make 2 HST units. Trim to 3.5”.
- Repeat steps 20 – 22 to make remaining Corner HST units. You will have 4 in total.
- Lay out all units to confirm you have the correct fabric placement, assemble block as per pattern diagram.
Hopefully these instructions aren’t too hard to follow and you end up with a block that you love. There’s nothing wrong with following the instructions as they are in the pattern, you’ll end up with a great block that way, I just prefer to make triangle units using this method because I’m clumsy and heavy handed and so tend to stretch out triangles when done as per the pattern method. This method allows me to make them and trim to size which helps with my accuracy. As always, find a method that works for you and use that!
That’s everything… for now… as always if you have any questions either drop me a line or leave a comment below and I’ll do my best to help you out. I hope you love making this quilt as much as I have, it’s such a fun way to make a unique sampler.


