
Diamonds on the Inside: Block Construction
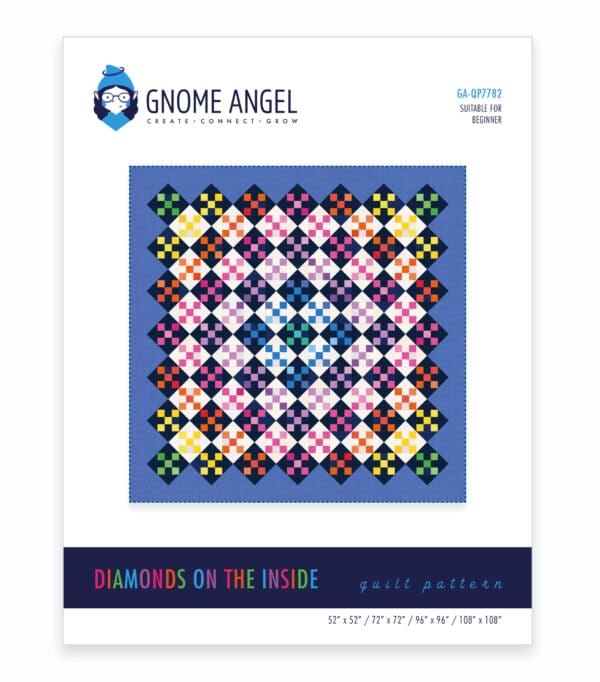
Diamonds on the Inside is my pattern for Month 3 of the 9 Patch Parade. This week we’re going to learn all about the basic block construction that makes up this fabulously fun quilt. This same construction method can be used for the Marti Michell pattern that is in the 9 Patch Starter Kit, “Mock Diagonal 9 Patch”.
Block information
Quilt Pattern: Diamonds on the Inside [CLICK HERE TO PURCHASE]
Construction Method: From Marti Michell Perfect Patchwork Templates and Rulers
From Marti Michell Perfect Patchwork Templates Used:
- From Marti Michell Patchwork Templates Set B OR
- From Marti Michell 6.5″ Fussy Cut Ruler OR
- From Marti Michell 8.5″ Squaring Up Ruler
- and From Marti Michell Flying Geese Ruler – Small.
Join the Facebook Group: Click here to Join
Before You Sew
- I pressed my as per the pattern (to one side).
- I used a Schmetz 70/10 needle.
- I used Wonderfil Konfetti Cotton 50wt in Pale Grey (KT906) thread for piecing.
- I used the From Marti Michell 8.5″ Squaring Up Ruler and From Marti Michell Flying Geese Ruler – Small.
- I used Flatter by Soak in Yuzu 248ml as my starch.
- I used a design board to layout my pieces while I worked. Click here for a tutorial on how to make your own.
If you’d like to know “My Top 10 Beginners Patchworking Tools” you can find them by clicking here.
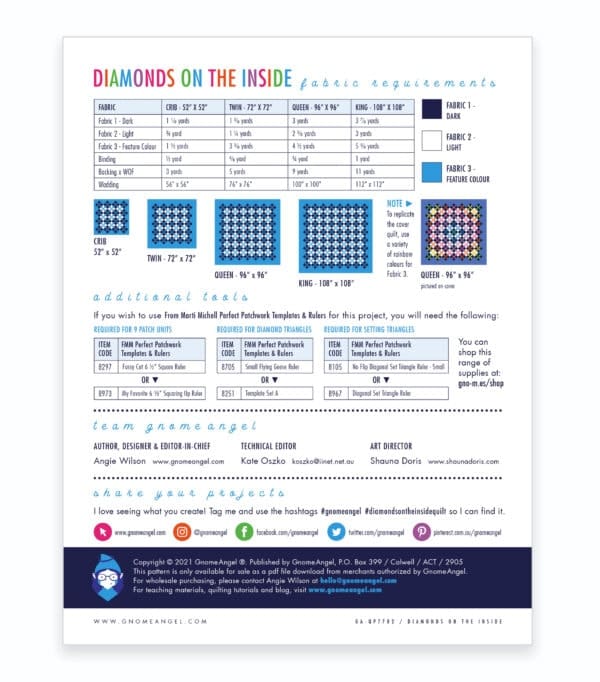
Measurements for the pieces needed to construct this block will not be provided in this tutorial. It is a prerequisite of making this block that you have a copy of the pattern, Diamonds on the Inside [CLICK HERE TO PURCHASE]. Measurements can be found in this pattern.
How to Make the Block
general advice:
- Tolerance Levels: you need to decide what is an acceptable tolerance level for “mistakes”. For example if your blocks are consistently 6¼” instead of 6.5″ are you ok with this. Or if your seams matching are less than an eight of an inch “off” are you ok with this. There’s no hard or fast rule and it’s different for everyone, so remember it’s your quilt so make your decision for you.
- Press your seams at each step. Click here for a great article on how to press your seams for patchwork.
- You can iron and starch your fabric prior to cutting. I also starch when pressing bulky seams.
- When pinning, pin away from you so that you don’t move your pieces when pinning.
- Where possible I chain piece all the pieces I can in one step. If you’re unsure of what chain piecing is, click here for a tutorial on how to do it.
The photos below show you the step progression of making this block. Please read the accompanying text before starting to make your block.

Block Assembly Steps
1: Cut Pieces
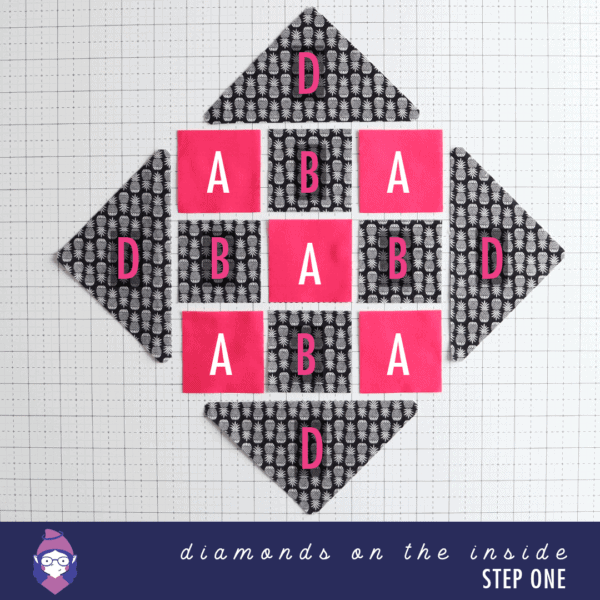
Use the From Marti Michell Perfect Patchwork Templates and/or Rulers to cut the pieces of the block. [Please see tutorial picture “Step One” for all pieces laid out.]
Refer to your copy of the pattern for piece sizing and templates.
This tutorial will show you the construction of a dark diamond, it will be the same for a light diamond only the pieces required change. Please refer to pattern.
2: Make 9 Patch (Dark Diamond)
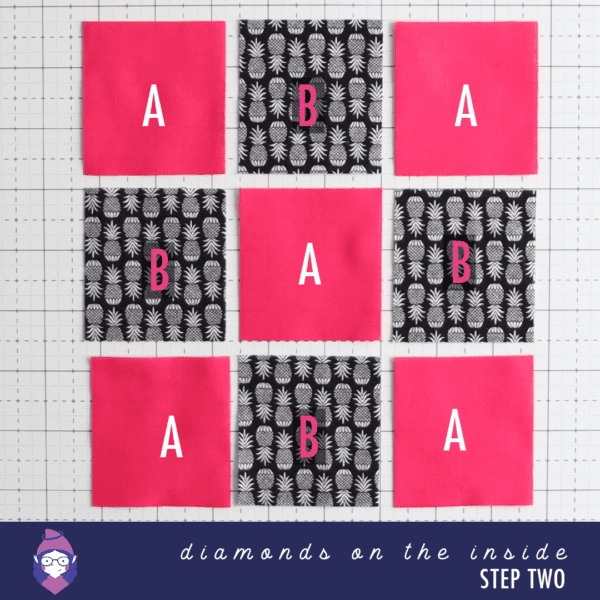
- Consists of 5 – Piece A and 4 – Piece B (alternatively if you’re making the light diamond it will be 5 – Piece A and 4 – Piece C)
- Tutorial picture STEP TWO shows these pieces laid out in their assembly order.
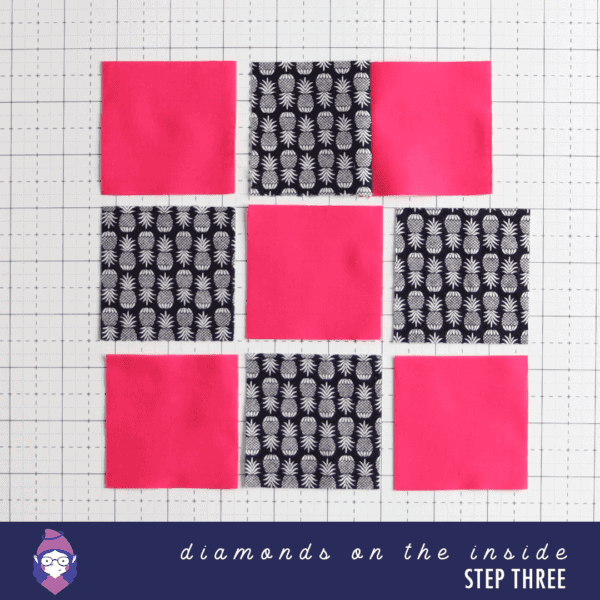
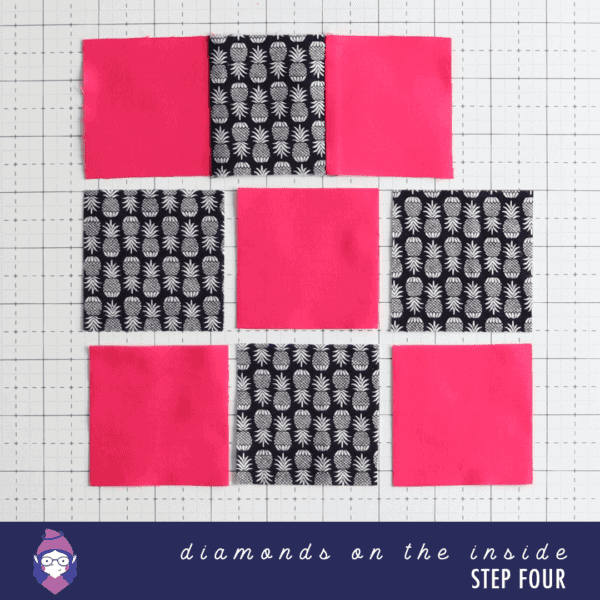
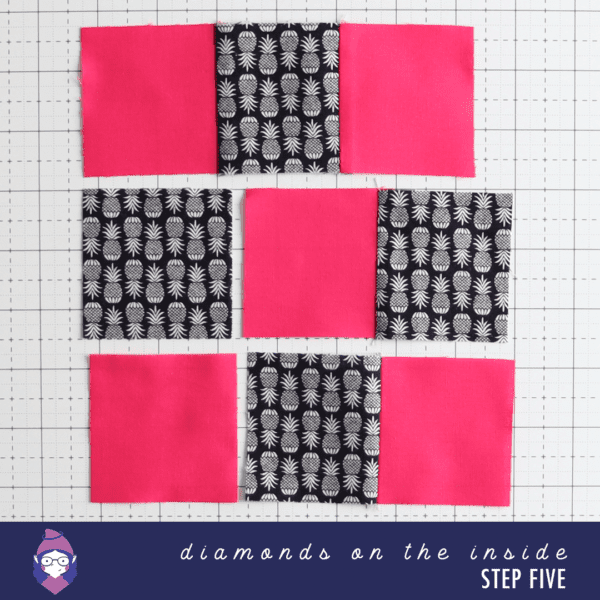
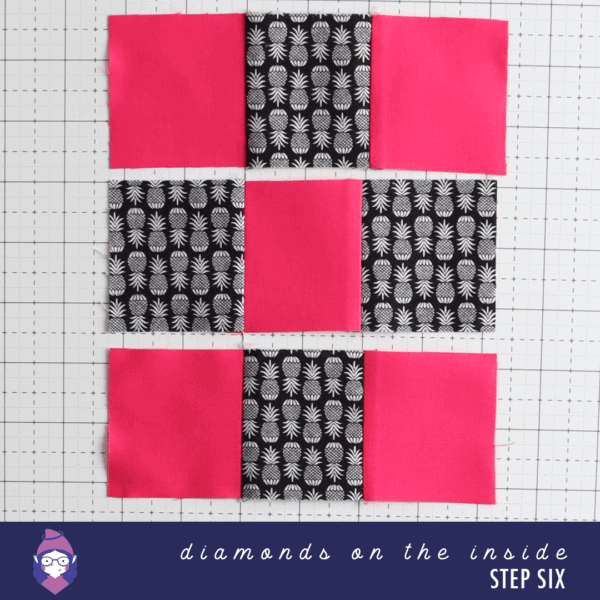
- Join the squares to make rows, as shown in tutorial picture STEP THREE, STEP FOUR, STEP FIVE and STEP SIX. Press as per pattern.
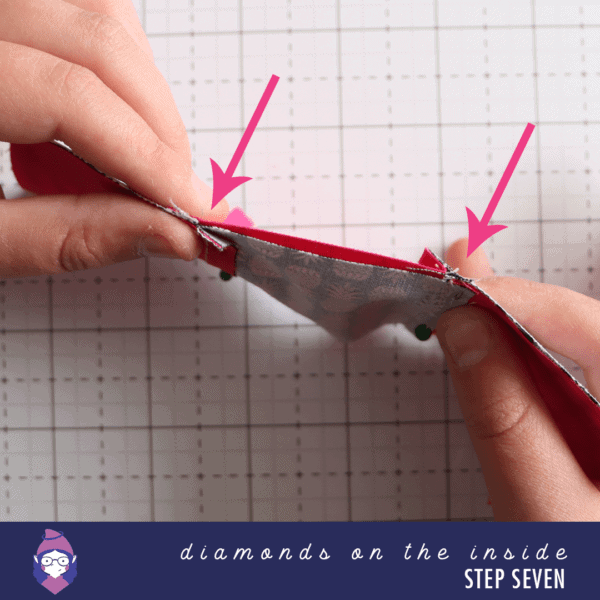
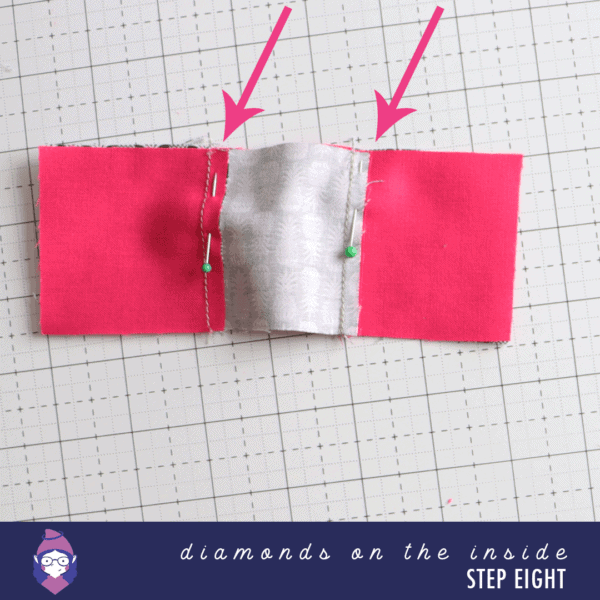
- TIP: Pressing your rows as per the pattern will allow you to easily nest the seams. Pinch the seams with your thumb and forefinger and slid them against each other until you feel them “lock” into place. STEP SEVEN shows this. Pin the seams in place, as per STEP EIGHT. Remember to pin away from you to stop seams moving during pinning.
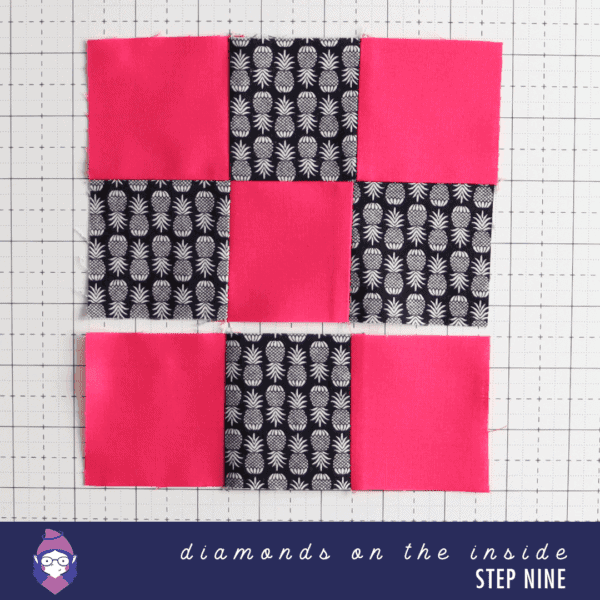
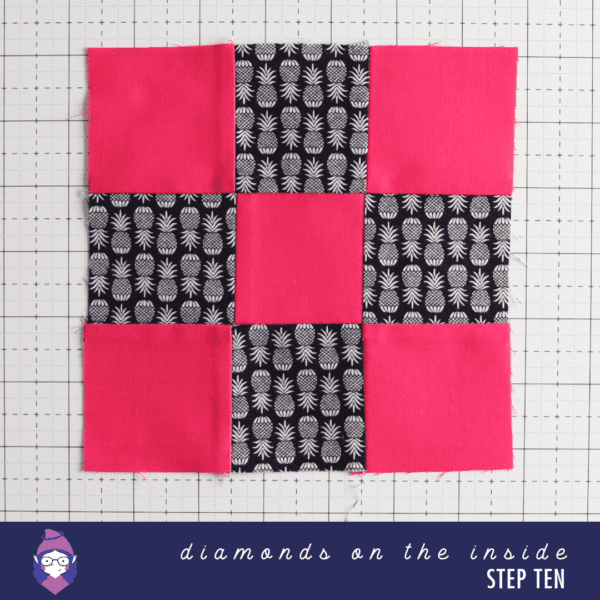
- Join rows together, as shown in STEP NINE and STEP TEN. Press as per the pattern.
- Repeat to make required number of light and dark 9 Patch units for your chosen quilt size.
3: Make Diamond (Dark Diamond)
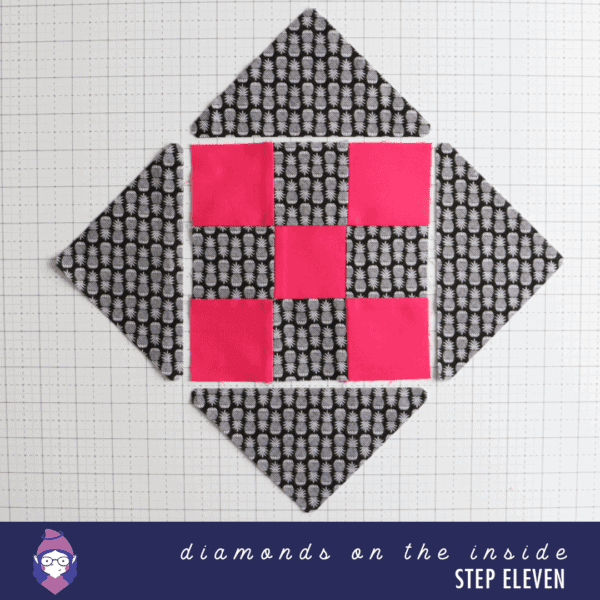
- Requires 4 – Piece D and 1 – 9 Patch Unit.
- Tutorial picture STEP ELEVEN shows these pieces laid out in their assembly order.
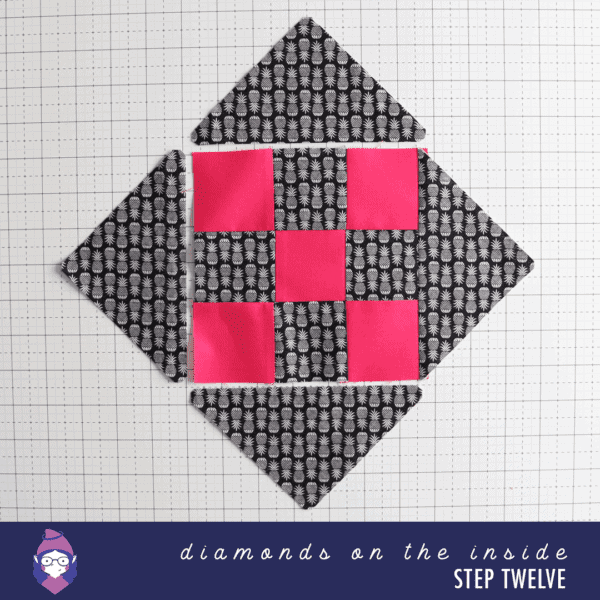
- Join right Piece D, as shown in tutorial picture STEP TWELVE. Press.
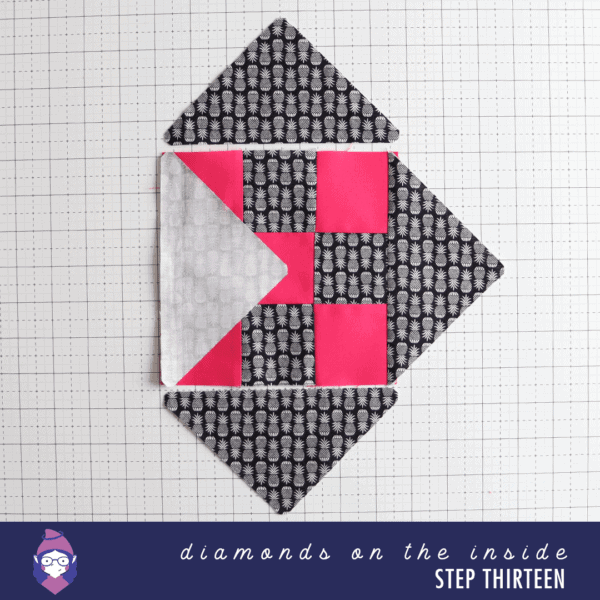
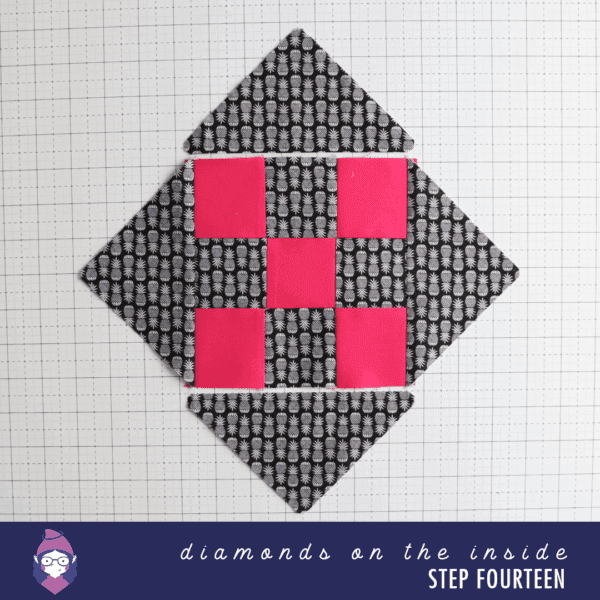
- Join left Piece D, as shown in tutorial picture STEP FOURTEEN. Press. [STEP THIRTEEN shows how this piece is attached if using the From Marti Michell Flying Geese Ruler – Small]
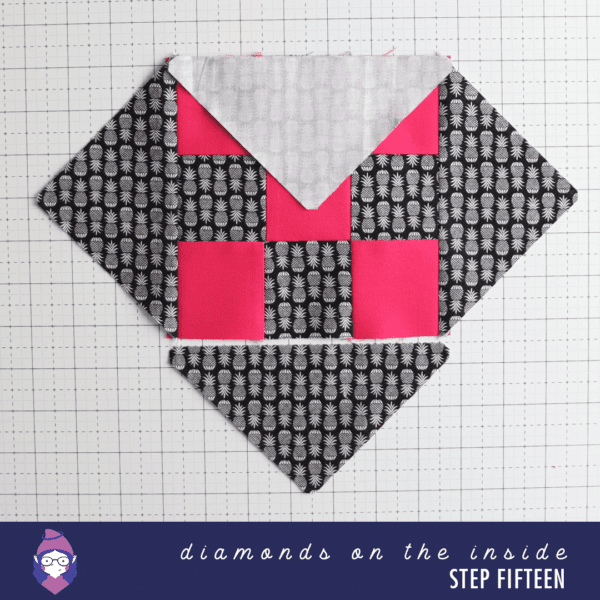
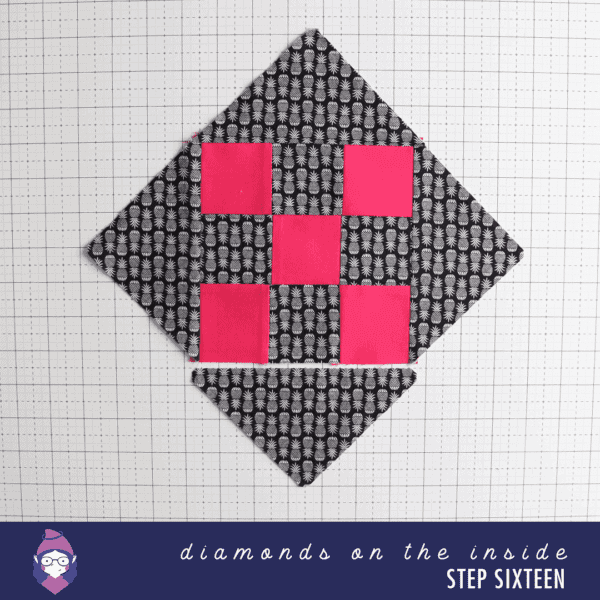
- Join top Piece D, as shown in tutorial picture STEP SIXTEEN. Press. [STEP FIFTEEN shows how this piece is attached if using the From Marti Michell Flying Geese Ruler – Small]
- Join bottom Piece D, as shown in tutorial picture COMPLETED BLOCK. Press.
- Repeat to make required number of light and dark diamond units for your chosen quilt size.
Next Week in the 9 Patch Parade
Next week in the 9 Patch Parade we’ll be taking your blocks and turning them into a completed quilt top ready for their big reveal! I can’t wait to see your finished quilt tops!
want to know more?
If you want to know more about the 9 Patch Parade (including how you can win prizes) be sure to click here.
If you’d like to connect with other 9 Patch Parade participants and get exclusive behind-the-scenes insight and more chances to win join the GnomeAngel Facebook Group [CLICK HERE TO JOIN]!
want to get the weekly 9 patch newsletter?
Simply fill in your details below to get weekly updates in your inbox.
[convertkit form=1932292]
.
got a question?
If there’s something you’d like further details about the information covered in this blog post simply drop me an email via my contact page and we’ll get it sorted together.


